微信小程序踩坑记——ColorUI组件的使用
ColorUI
简介
ColorUI是一个css库!!!在你引入样式后可以根据class来调用组件,一些含有交互的操作我也有简单写,可以为你开发提供一些思路。
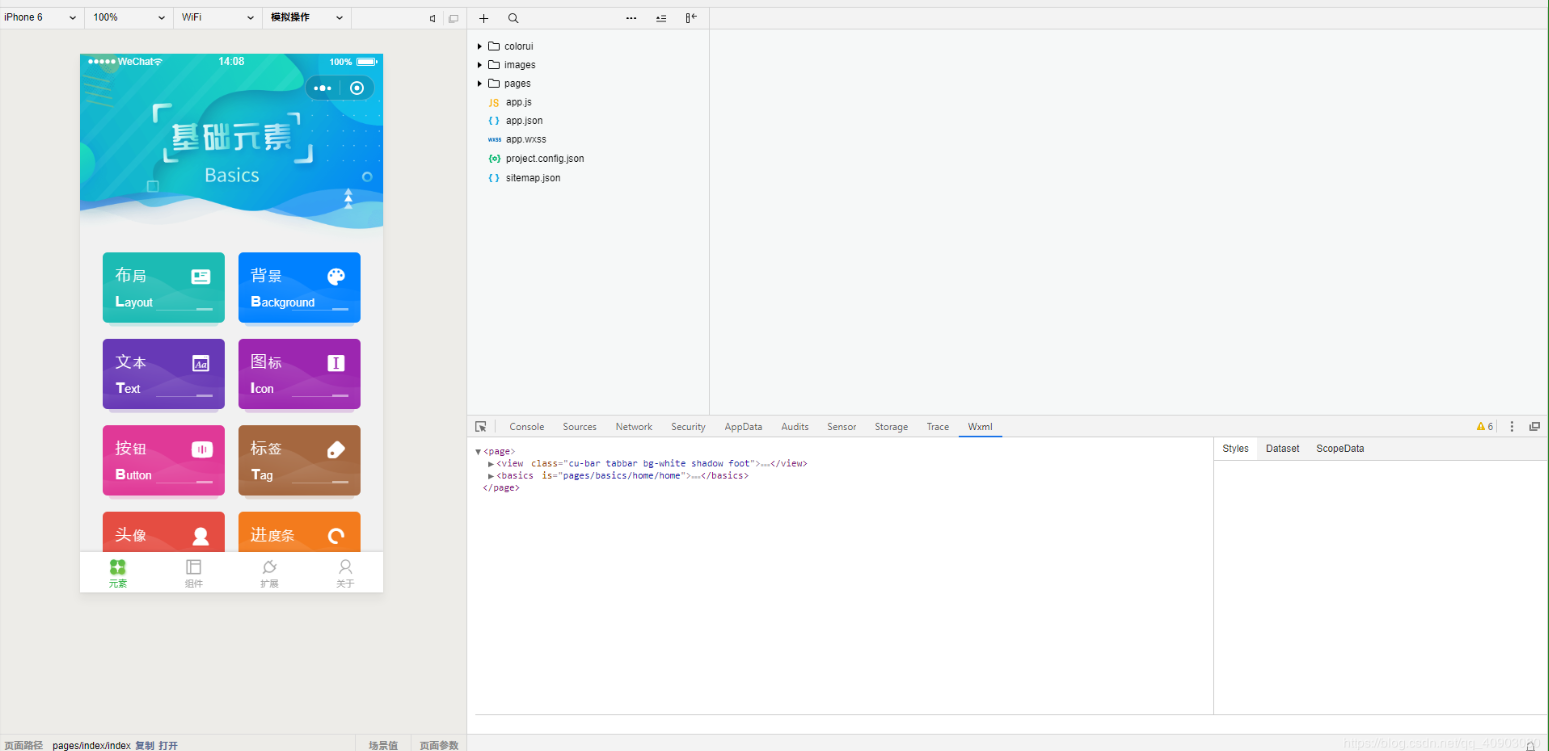
ColorUI组件库作者牛逼!!ColorUI组件好看又实用,从官网或者GitHub下载源码后,直接在微信小程序打开即可看到效果

下载
下载Github上的组件之后,解压,复制ColorUI-master\demo\下面的colorui文件夹到自己项目里的根目录即可(即与app.js等同级)
样式引入
在app.wxss中引入colorui中的样式库,示例如下:
/**app.wxss**/
@import "colorui/main.wxss";
@import "colorui/icon.wxss";
@import "colorui/animation.wxss";  /** 最后这个看自己需求,如果需要使用微动画则可以引入**/
自定义导航栏使用
ColorUI提供自定义的导航栏使用很方便,引入时,需要在app.json全局配置中添加自定义组件,如下:
1.再app.js获取系统信息 ,来确定合适的导航栏高度
// app.js
 onLaunch: function() {

    this.globalData = {} // 务必确保这一行在前面

    wx.getSystemInfo({
      success: e => {
        this.globalData.StatusBar = e.statusBarHeight;
        let custom = wx.getMenuButtonBoundingClientRect();
        this.globalData.Custom = custom;
        this.globalData.CustomBar = custom.bottom + custom.top - e.statusBarHeight;
      }
    })
},
2.在app.json中关闭默认的导航栏样式和引入自定义导航栏
// app.json
{
    "window": {
		"navigationStyle": "custom"
	},
    "usingComponents": {
    	"cu-custom": "/colorui/components/cu-custom", // 引入colorui的自定义导航栏
  	}
}
3.在页面中使用
// page.html
<cu-custom bgColor="bg-gradual-pink" isBack="true">
	<view slot="backText">返回</view>
	<view slot="content">导航栏</view>
</cu-custom>

其他配置
| 参数 | 作用 | 类型 | 默认值 |
|---|---|---|---|
| bgColor | 背景颜色类名 | String | ’’ |
| isBack | 是否开启返回 | Boolean | false |
| isCustom | 是否开启左侧胶囊 | Boolean | false |
| bgImage | 背景图片路径 | String | ’’ |
| slot块 | 作用 |
|---|---|
| backText | 返回时的文字 |
| content | 中间区域 |
| right | 右侧区域(小程序端可使用范围很窄!) |
字体大小
| 类名 | 介绍 | 实际属性 | 说明 |
|---|---|---|---|
| text-xsl | 特大号字 | font-size: 120rpx; | 用于图标、数字等特大显示 |
| text-sl | 较大号字 | font-size: 80rpx; | 用于图标、数字等较大显示 |
| text-xxl | 特殊字 | font-size: 44rpx; | 用于金额数字等信息 |
| text-xl | 页面大标题 | font-size: 36rpx; | 页面大标题,用于结果页等单一信息页 |
| text-lg | 页面小标题 | font-size: 32rpx; | 页面小标题,首要层级显示内容 |
| text-df | 正文 | font-size: 28rpx; | 页面默认字号,用于摘要或阅读文本 |
| text-sm | 辅助信息 | font-size: 24rpx; | 页面辅助信息,次级内容等 |
| text-xs | 说明文本 | font-size: 20rpx; | 说明文本,标签文字等关注度低的文字 |
文字对齐
| 类名 | 介绍 | 实际属性 |
|---|---|---|
| text-left | 特大号字 | text-align: left; |
| text-center | 较大号字 | text-align: center; |
| text-right | 特殊字 | text-align: right; |
页面布局(flex布局)
固定尺寸 在父级元素类名中添加 flex flex-wrap之后,在子级元素类名添加以下类名即可。
| 类名 | 介绍 | 实际属性 |
|---|---|---|
| basis-xs | 20%宽度 | flex-basis: 20%; |
| basis-sm | 40%宽度 | flex-basis: 40%; |
| basis-df | 50%宽度 | flex-basis: 50%; |
| basis-lg | 60%宽度 | flex-basis: 60%; |
| basis-xl | 80%宽度 | flex-basis: 80%; |
比例布局 在父级元素类名中添加flex之后,在子级元素类名添加以下类名即可。
| 类名 | 介绍 | 实际属性 |
|---|---|---|
| flex-sub | 相同宽度 | flex: 1; |
| flex-twice | 两倍宽度 | flex: 2; |
| flex-treble | 50%宽度 | flex: 3; |
水平对齐 在父级元素类名中添加flex ,同时添加以下类名即可。
| 类名 | 介绍 | 实际属性 |
|---|---|---|
| justify-start | 左对齐(默认值) | justify-content: flex-start; |
| justify-end | 右对齐 | justify-content: flex-end; |
| justify-center | 居中 | justify-content: center; |
| justify-between | 两端对齐,项目之间的间隔都相等。 | justify-content: space-between; |
| justify-around | 每个项目两侧的间隔相等。所以,项目之间的间隔比项目与边框的间隔大一倍。 | justify-content: space-around; |
垂直对齐 父级元素类名中添加flex ,同时添加以下类名即可。
| 类名 | 介绍 | 实际属性 |
|---|---|---|
| align-start | 起点对齐 | align-items: flex-start; |
| align-end | 终点对齐 | align-items: flex-end; |
| align-center | 中点对齐 | align-items: center; |
内外边距
内外边距一共有五种尺寸,{size}类名分别为:-xs,sm,df,lg,xl,分别从10rpx,20rpx,30rpx,40rpx,50rpx。
| 类名 | 介绍 | 类名 | 介绍 |
|---|---|---|---|
| .margin-{size} | 外边距 | .padding-{size} | 外边距 |
| .margin-lr-{size} | 水平方向外边距 | .padding-lr-{size} | 水平方向内边距 |
| .margin-tb-{size} | 垂直方向外边距 | .padding-tb-{size} | 垂直方向内边距 |
| .margin-top-{size} | 上外边距 | .padding-top-{size} | 上内边距 |
| .margin-right-{size} | 右外边距 | .padding-right-{size} | 右内边距 |
| .margin-bottom-{size} | 下外边距 | .padding-bottom-{size} | 下内边距 |
| .margin-left-{size} | 左外边距 | .padding-left-{size} | 左内边距 |
图标用法
之前在app.wxss引入了icon.css,现在可以直接使用。
使用方法:text标签 ,类名:cuIcon-
<!--page.wxml-->
<text class="cuIcon-apps text-gray"></text>
其中,ColorUI图标分两个模式,普通模式和fill状态。fill状态直接在普通状态的名字后加上fill即可。


